In the world of precision manufacturing and custom fabrication, quality isn’t just a buzzword; it’s the very foundation of success. Every component, every machined part, needs to meet stringent specifications to ensure the final product performs as intended. This meticulous attention to detail is what separates exceptional machine shops from the rest, and it’s heavily reliant on a robust inspection process.
However, an inspection is only as good as its documentation. Without a clear, consistent, and comprehensive record of what was checked, who checked it, and what the findings were, the entire quality control effort can quickly fall apart. This is where a well-designed machine shop inspection report template becomes an invaluable asset, transforming raw data into actionable insights and ensuring traceability.
Think of it as your shop’s quality blueprint, guiding inspectors through each crucial step and capturing all necessary information efficiently. It’s not just about finding errors; it’s about preventing them, maintaining high standards, and fostering trust with your clients. Let’s explore what makes such a template indispensable and how it elevates your entire operation.

Building a Robust Machine Shop Inspection Report Template
Creating an effective machine shop inspection report template is about more than just listing a few checkboxes; it’s about designing a system that ensures consistency, thoroughness, and clarity for every single inspection. The goal is to capture all critical data points required to verify product quality, comply with industry standards, and provide a clear audit trail. A good template acts as a structured guide, preventing oversights and standardizing the reporting process across all shifts and inspectors.
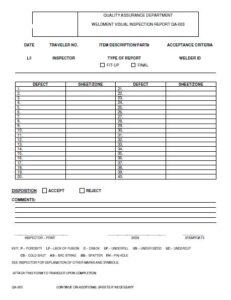
The core of any useful inspection report lies in its ability to clearly identify the part or project being inspected. This usually begins with basic identifying information like the job number, part number, revision level, and the date of inspection. Including details about the inspector themselves is also crucial, offering accountability and allowing for follow-up questions if needed. This initial section sets the context for everything that follows, ensuring that the inspection data is correctly associated with the specific work order.
Beyond identification, the template must delve into the actual measurements and observations. This is where precision tooling and expertise come into play. Inspectors will record critical dimensions, surface finishes, material specifications, and any other relevant characteristics against specified tolerances. The template should provide ample space for these values, often including columns for the nominal dimension, actual reading, tolerance limits, and whether the part passed or failed that particular check.
Essential Elements for Your Inspection Report
To ensure your template covers all bases, consider these key sections:
- Job and Part Information: Project name, job number, part number, revision, quantity inspected, material type, heat treat specs.
- Inspector Details: Inspector’s name/ID, date of inspection, shift.
- Inspection Equipment Used: List of tools (calipers, micrometers, CMM, gauges), their calibration status/ID.
- Dimensional Measurements: Specific dimensions to check, nominal values, upper and lower tolerance limits, actual measured values, pass/fail status.
- Visual Inspection: Checklist for surface finish, burrs, tool marks, dents, scratches, cleanliness.
- Non-Conformances: Section to detail any findings that do not meet specifications, including a description, severity, and reference to relevant drawing notes.
- Corrective Actions: Space to describe immediate actions taken for non-conforming parts (e.g., rework, scrap, quarantine).
- Final Disposition: Overall pass/fail status for the batch, along with a final approval signature.
A well-structured template also encourages the use of standardized terminology and codes, reducing ambiguity. For instance, instead of free-form notes, categories for common discrepancies or actions can be pre-defined. This not only speeds up the inspection process but also makes the data much easier to analyze later on, helping to identify recurring issues or areas for process improvement.
Finally, remember that a template isn’t static. It should evolve with your shop’s needs, new machinery, or changing client demands. Regularly review its effectiveness and gather feedback from your inspectors. Embracing digital versions can further enhance efficiency, allowing for easier data entry, automated calculations, and seamless integration with other quality management systems, leading to a truly optimized workflow.
Enhancing Quality Assurance with Your Template
Beyond simply documenting “pass” or “fail,” a thoughtfully designed machine shop inspection report template can be a powerful tool for elevating your entire quality assurance strategy. It transforms from a mere checklist into a diagnostic instrument, providing the insights needed to refine your processes and prevent future errors. When consistently used and properly analyzed, the data collected can reveal patterns that might otherwise go unnoticed.
For instance, if a particular dimension consistently falls near the upper or lower tolerance limit across multiple production runs, it could indicate a need for machine recalibration, a jig adjustment, or even a review of the manufacturing process itself. This kind of trend analysis, made possible by standardized reporting, moves your shop from reactive problem-solving to proactive prevention. It allows you to address root causes rather than just fixing symptoms, saving time and material in the long run.
Furthermore, a robust template serves as a critical communication bridge, both internally and externally. Internally, it ensures that all team members, from operators to management, have a clear understanding of quality expectations and inspection results. Externally, it provides undeniable proof of quality to your clients, enhancing their confidence in your capabilities and helping to build long-term relationships. It demonstrates your commitment to precision and accountability, solidifying your reputation as a reliable partner.
Implementing a comprehensive machine shop inspection report template is more than just a procedural requirement; it’s a strategic investment in your shop’s operational excellence. It streamlines the inspection process, ensures thorough documentation, and provides the critical data needed for continuous improvement. By standardizing how you record and analyze inspection results, you empower your team to maintain the highest levels of precision and quality, minimizing waste and maximizing customer satisfaction.
Ultimately, a well-executed inspection reporting system fosters a culture of quality throughout your organization. It reduces risks, enhances traceability, and builds a strong foundation for trust with every part that leaves your shop. This commitment to detail, driven by an effective template, is what propels your machine shop toward sustained success and a sterling reputation in a competitive industry.


